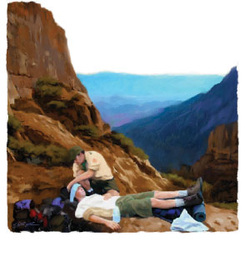
 Four factors loom large in illnesses when you’re hiking — poor judgment, inclement weather, inadequate clothing, and faulty gear.
Recently, the Centers for Disease Control and Prevention ranked hiking as the third most dangerous outdoor recreational activity, based on injuries reported by 63 U.S. hospitals.
While hiking comprises just 6.3 percent of all outdoor sports and recreational accidents, as published in Wilderness and Environmental Medicine, it’s worth knowing that many of these ailments can be prevented. Poor weather, inadequate clothing, and faulty gear contribute to many trail illnesses.
The best advice for healthy hiking? With weather—don’t push your luck. An experienced leader, faced with bad weather, knows when to turn back, even short of a goal. This includes heavy winds, rain, lightning, and blizzards.
Update and maintain your equipment. This includes clothing, shelter, stoves, and boots. Always match your equipment list to the terrain and environment you’ll be hiking through.
The following five conditions can turn a trip of a lifetime into a fight for your life. All of them are more easily prevented than cured, and all of them are potentially fatal medical emergencies. Simple planning and “being prepared” can turn the odds in your favor.
DEHYDRATION
Most people equate dehydration with hot weather and heat-related ailments such as heat stroke. Dehydration can also contribute to hypothermia and altitude sickness. In fact, drinking enough water is probably the No. 1 way to keep you healthy—in cold and hot weather.
Prevention: Never skimp on water. Drink as much as you can before you start hiking, and continue drinking regularly. Use maps, guidebooks, and current local information from rangers to find out where the water sources are and how reliable they are. In dry or desert environments, drink at every water source and carry extra water so you won’t go dry. In cold weather, cook up hot drinks to make hydration more appealing.
Symptoms: Thirst, dark-yellow urine, dizziness, headaches, nausea and vomiting, and—later—unconsciousness.
Treatment: Cool down, rest, and drink. Use electrolyte-replacement drinks or a homemade version consisting of a tablespoon of sugar and a half teaspoon of salt in a liter of water.
HEAT EXHAUSTION
Closely related to dehydration are heat exhaustion and heat stroke.
Prevention: Drink often, take plenty of shade breaks, don’t push too hard, walk in cooler parts of the day, take advantage of streams and lakes for a quick temperature-reducing dip, and, on a long hike, take it easy until your body has had time to acclimate to heat. Wear well-ventilated clothing that covers your skin.
Symptoms: Dizziness, light-headedness, confusion. Heat exhaustion victims will be sweaty and clammy. In heat stroke, victims will be flushed but dry and hot to the touch. Heat stroke symptoms also include fever, seizures, rapid heartbeat, and loss of consciousness.
Treatment: Place the victim in the shade, covered with water or with towels and clothes soaked in cool water. Treat for shock. Administer water or electrolyte-replacement drinks, and seek medical attention.
HYPOTHERMIA
Hypothermia, an insidious threat, often goes unrecognized until it becomes an emergency. You don’t have to experience snow camping in Siberia to be at risk. Hiking on a 50-degree day with occasional rain showers or rafting on a cold river can be equally dangerous.
Prevention: Drink frequently, even if you don’t feel thirsty. Check your gear (hats and gloves, especially). Note early signs of chill, such as shivering, and reduce or eliminate your exposure immediately, especially in wet conditions. Drink hot liquids or build a fire.
Symptoms: The “umbles” (stumbles, mumbles, fumbles, grumbles). Shivering stops, but the body temperature is cold. Also, fatigue, forgetfulness, irrationality, staggering, and unconsciousness.
Treatment: Eliminate exposure (put up a tent, get out of the elements, sit on an insulating pad, get into a sleeping bag), make a hot drink, and gently warm the victim. Hikers are far more successful at preventing hypothermia outdoors than curing it. A severe case will require an emergency rescue evacuation.
HIGH-ALTITUDE SICKNESS
Altitude sickness is a result of traveling or climbing too high too fast: The body doesn’t have time to adjust, and symptoms progress from a headache to life-threatening edemas (swelling of the lungs and brain). Altitude sickness strikes different people at different elevations, but most people feel some effects at elevations above 10,000 feet.
Prevention: Hike high, camp low. Hiking higher exposes your body to the new elevation; camping low lets you adjust to it. On climbs where this is not possible, limit your net elevation gain to no more than 1,000 feet per day (once you’re above 10,000 feet). The drugs Diamox and, believe it or not, Viagra are commonly used to help prevent high-altitude sickness. They must be prescribed by a physician and taken as directed.
Symptoms: Above 10,000 feet, assume that any unusual symptoms are the result of altitude. Common early symptoms are loss of breath, headaches, sluggishness, loss of appetite, and nausea. More serious symptoms include disorientation, staggering, irrationality, loss of balance, and, finally, pulmonary and cerebral edemas.
Treatment: Treat the early symptoms and you won’t have to deal with the later ones. You can wait out the minor symptoms and see if you acclimate—many people do—after taking a rest day. If symptoms persist or worsen, returning to a lower elevation is the only treatment.
HYPONATREMIA
Ironically, this condition can occur in the same hot weather that causes heat-related illnesses. Drinking too much water, often in conjunction with excessive sweating, causes hyponatremia. Sweating causes the loss of salts and electrolytes. The imbalance makes it impossible for the body to properly function. Untreated, a serious case can lead to kidney (and other organ) failure.
Prevention: Scale it down a notch. In hot weather, cut back your mileage and pace and take plenty of rests. Most important: Snack frequently, whether you’re hungry or not, to replace the electrolytes. One of the best snacks is a handful of mixed nuts, fruits, and banana chips, which contain salts, sugars, and potassium.
Symptoms: Early symptoms occur when you drink a lot but still experience persistent thirst. Other symptoms include urinating frequently, excessive sweating, nausea, vomiting, and headaches.
Treatment: A mild case of hyponatremia can be treated with rest, food, and electrolyte-replacement drinks. Sauces with salts replace the electrolytes. More severe cases require medical attention.
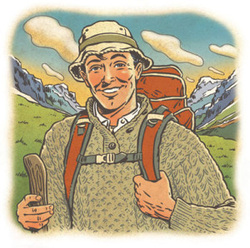 Kephart believed that expert skills and appropriate gear were the keys to comfort in the wild outdoors. And you should never be miserable on a camping trip, either. So here are some tips for camping in comfort.
Protect the Head
Bring more hats than you think you’ll need. These three will keep you prepared for any weather: a broad-brimmed canvas hat (preferred) or ball cap for sun, a wool stocking cap for cold, and a waterproof “sou’wester” for rain. In cold weather, bring along a wool balaclava for use as a neck warmer and/or sleeping helmet.
Buy Clothes Big
Long-sleeved shirts and sweaters should be a full size larger than your city clothes. Rain jackets and shells should be larger still, and cut full—like an Inuit winter parka—so that they will fit over bulky clothes. Sleeves should be wide for ease of movement. Zippers should close high on the neck so icy air can’t chill your chest; most parkas leave a gap at the throat when they’re zipped up. And, more often than not, underarm zippers will leak in heavy rain—even those claiming to be waterproof.
Nix the Rain Pants
The zippered ankle closures don’t keep out rain—they just restrict ventilation and make you sweat (primitive man learned long ago that water doesn’t flow uphill). Plus, the zippers jam with debris and often fail. And the zippered legs can’t be shortened to fit short people. Avoid rain pants with wicking liners. When the liners get wet, they droop below the cuff and absorb water and wick it to your legs. They may also catch on vegetation and cause a fall.
Go With Wool
Always bring a long-sleeve wool shirt and lightweight long johns, even in the summer. Wool has a greater temperature comfort range versus synthetics. It’s more breathable, and it doesn’t develop obnoxious odors. If you think you’re allergic to wool, you haven’t tried Merino wool from Australia and New Zealand. Tip: You can shrink-fit military surplus woolens to fit small kids if you cook the woolens in boiling water for five minutes and then dry them with high heat. For centuries lobster fishermen used this “shrink-fit” procedure to make their woolens water-resistant.
Mix Fabrics
While you might get by with a cotton T-shirt, a synthetic fabric (such as Dry-Fit) will help keep you cool during summer. But socks, no matter the season, should always be nearly pure wool. Trousers may be nylon, polyester, cotton-polyester, or a mix of these fabrics. Shorts and sunburn go hand-in-hand. Do not wear blue jeans except for day hikes in perfect weather.
Jacket for Windy Weather
Everyone should have a breathable nylon wind shell for dry, blustery days outdoors. Wear the wind shell for gusty weather and save your rain gear for rain. Why? Because any garment that is worn too much will soon develop holes. Store rain clothes in a protective fabric sack in your pack.
Sit When Possible
Camp chores—cooking, washing dishes, tending the fire—go easier when you don’t sit on the ground. So, bring a folding stool. One variety has a backrest and zippered storage pouch, and it sits on two parallel aluminum rails that won’t sink into the ground. When not in use, it folds flat and clips (with bungee cords) to a pack. When weight is a concern, nix the stool and bring a square of closed-cell foam.
Cover the Hands
Wear wool gloves with rubber traction dots for cold and neoprene gloves for rain. Winter trips demand both gloves and mittens.
Keep It Personal
Everyone should have a personal supply of adhesive bandages, aspirin, soap, and hand cream in case the first-aid kit is inaccessible (perhaps in a leader’s pack).
Each person should take responsibility for small cuts that can become infected if they’re not washed and quickly bandaged. Frequent use of hand cream will deter cracked skin. And how can you freshen up during the day if your toothbrush and soap are packed away?
Many Scouts don’t have the latest gear. But they often camp more comfortably than non-Scouts who do. Why? Because Boy Scouting takes its motto seriously: Be Prepared.
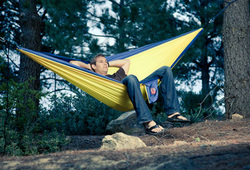 Hammock camping is taking Scouting by storm. More and more troops are integrating them into regular monthly outings and sightings at high-profile events such as recent world and national jamborees.
But what is hammock camping all about, and should your troop really take it seriously? Are hammocks really that great? Most folks are convinced only after they get a chance to lay in a hammock, but until that opportunity comes, here are my top 10 reasons to consider hammock camping:
10. It’s affordable! Hammocks are some of the simplest shelters around and have been used for centuries. A basic hammock costs as little as $20, and models with integrated bug nets (e.g., “jungle hammocks”), can be found for $60. Our Scout troop chose to make their own hammocks, complete with zippered bug netting and inexpensive tarps, for $30 a piece. High-end commercial camping hammocks, complete with tarp and bug netting, are still reasonable at $100.
9. It’s lightweight. A fully decked-out camping hammock, complete with zippered bug netting and a tarp, can weigh as little as 30 ounces. Creative hangers have gone sub-ultralight with hammock set-ups as light as 13 ounces.
8. It’s packable. Unless you’re tarp camping, most Boy Scout backpacking tents are bulky. Splitting up poles, rain fly, and tent body help distribute the mass, but they still take up a lot of room. Most camping hammocks stuff down to the size of small cantaloupe. An 8-foot by 10-foot tarp can fold down flat and tight, freeing up room and reducing weight.
7. It’s refreshing! At a summer camp in West Virginia, I remember being cooped up in a dome tent desperately seeking ventilation. Even with all the doors, vents, and windows open, there was little I could do to cool off. Hammocks, by comparison, are built specifically for hot, muggy climates. With 360-degree air circulation, hammocks are the perfect summer accommodation with superior ventilation, convective cooling, and air flow. Fast-drying nylon camping hammocks can even be sprayed with water for refreshing evaporative cooling.
A sample of the illustration guide in “The Ultimate Hang.”
6. You can still use your regular sleeping bag and pad. A hammock doesn’t replace the need for adequate insulation, but you don’t need to spend a fortune to stay warm. You can use the same bedding from a tent, including a good sleeping bag and insulated pad (closed-cell foam or self-inflating). With the right insulation, you can hammock camp year round.
5. It reinforces and supports the Youth Protection guidelines. Hammocks are designed for single-occpancy, providing separate accommodations in a private, bug-free enclosure. Privacy for the youth is promoted with a fully-enclosed, individual shelter where the Scout can change clothes and be protected.
4. It’s Leave No Trace friendly. Hammocks can be set up in impact-resistant places where tents cannot comfortably go, such as over boulders and rock fields. Hammocks are also suspended above the ground, which reduces trampling at a camp site. In addition, the ground no longer needs to be cleared of rocks, twigs, or other offending discomforts, leaving a site in a more pristine condition. And with protective webbing straps, trees are protected from strangulation and scarring.
3. It gets you off the rocks, roots, bugs, muck, and slope of the ground. Speaking of discomforts, hammocks hang above them all. You no longer have to find a level spot and you can avoid the unpleasant routine of scraping the tent floor of gunk and drying out the tent before packing. Hammocks can be pitched without ever touching the ground, and mildew-resistant nylon hammock tarps can be packed separately when they get wet.
Image courtesy of Grand Trunk.
2. It makes camping exciting! Scouts love hammock camping—it’s just plain fun! No matter how many times I bring hammocks on camping trips, they seem to maintain their novelty and attraction with the boys. When I started up with a new troop in Arizona, I noticed that several boys and leaders had a certain apathy toward camping, but after introducing hammocks, their interest was piqued. I used a hammock during our 50-mile backpacking trip and afterwards the Scouts were begging to get their own. During subsequent troop meetings, we sewed up hammocks for each Scout. Now, both youth and adult Scouters ask about upcoming camping trips and whether or not we can bring hammocks.
1. It’s incredibly comfortable. The number-one reason Scouts should use hammocks camping is because hammocks are extremely comfortable. No more rocks and roots in your back, and no more sliding on uneven ground. Scientific research confirms that the gentle rocking motion contributes to deeper, more fulfilling sleep. During long-term resident camping, hammocks provide a cozy bed you can look forward to night after night.
 MAKING YOUR OWN dehydrated snacks and meals require a little advance planning and preparation, but the reward of enjoying great-tasting and nutritious food on the trail makes it all worthwhile.
For weekend backpacking trips, you can dehydrate and pack all your food during the week before the trip. For a weeklong trip, start drying the food two weeks before you depart. You can’t leave it to the last minute! Getting it done early will give you peace of mind knowing your food supply is all set.
Most of the action involved in dehydrating food takes place inside the dehydrator. It takes less than an hour to cut up fruits and steam vegetables. Once you put the food in the dehydrator, the machine will quietly do the work while you sleep or go to work or school. A timer that automatically shuts off the machine after the programmed amount of time is a valuable feature to look for in a dehydrator. Appliance-grade timers can also be purchased separately if your dehydrator doesn’t have one.
Start with a Menu
Write up a menu for each day of your trip. This will include breakfast, lunch, dinner, four to five snacks and a dessert for dinner. Plain water is the easiest beverage to consume on the trail, but if you want flavored drinks there are plenty of powdered drink mix products available. Pack these in individual servings.
Snacks
Snacks might include individual servings of trail mix, nuts, Goldfish and dried fruit. Make a list of the dried fruits you would like to eat. Apples, pears and bananas are three favorites. A good serving size is a half-cup of dried fruit, which is close to eating one and a half fresh apples, pears or bananas.
Break the Recipes Down Into Ingredients
Tally up all the ingredients from the recipes you plan to use to determine how much of each dried food you will need. Some items like macaroni, rice and oats you will simply purchase.
Dehydrate the Food
As you become more experienced with drying food, you will learn the quantity any type of food will yield when dried. To get you started, here is a list of the drying yields of common foods mentioned in this series.
 How to start a fire in the woods, even when it’s wet.
One a bone-dry day or when there’s plenty of dry paper or fire-starter, anyone can make a fire. If the weather deteriorates to a persistent rain, they might get smoke. But that’s no guarantee they’ll get fire. Here’s how you can make a fire when the woods are wet with rain.
This method isn’t fast, but it works with any kind of wood—even damp wood. You’ll need a:
- Sharp knife. To split fine kindling, set the sharpened edge of the knife on the end of an upright piece of wood then pound the spine through with a thick stick. Use a folding knife with a secure lock so the blade won’t close on your hand when you pound on the spine.
- Folding saw.
- Small hatchet to use as a splitting wedge, never as a chopper.
First, collect your wood. Locate a dead, downed tree, out-of-sight of tents, trails, and waterways. Saw off an arm-thick limb. Touch the sawed end of the limb to your cheek (the center should feel dry). Don’t worry if there’s a ring of wet wood near the bark; you’ll discard it when you split the piece. Reject the wood if it smells damp or punky. The wood is good if it passes both cheek and smell tests.
Saw the limb into footlong sections and split each section into kindling. Note that the hatchet is used as a splitting wedge so there’s no chance of an accident.
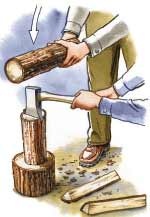 Splitting wood is easier (and safer) with two people. Hold the hatchet with both hands and have a friend knock it through.
Hold the hatchet firmly with both hands and allow a friend with a log chunk to pound the hatchet head through.
Use that same procedure (with a lighter log) to split fine kindling with your knife. Then, use your knife to prepare your tinder. Cut a handful of wafer-thin shavings (Figure 2) from your dry splittings.
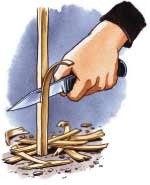 Now that you’ve reached the dry part of the wood splittings, slice off several wafer-thin shavings to use as tinder.
Assemble the tinder (a handful of dry wood shavings no thicker than a match), kindling (one-eighth to one-quarter-inch thick dry wood splittings), and fuel (quarter-split logs). Trim all bark and damp wood from your tinder and kindling, and separate your wood into piles—tinder, kindling, and fuel.
If it’s raining, work under a tarp so that all the materials stay dry.
Starter Accessories
- Carry a candle and chemical fire-starters.
- Cotton balls dipped in Vaseline, a flattened wax milk carton, and cigar-size newspaper logs that have been dipped into melted paraffin make good fire-starters. Don’t use loose newspaper pages; they absorb moisture on damp days.
- Make a “fire blower” as a bellows to nurse a developing flame by attaching a 6-inch piece of aluminum or copper tubing to a piece of rubber hose.
Once you have gathered the materials, build your fire from the ground up by following the four steps below.
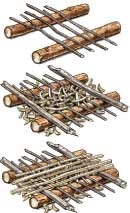 Build It Right
- Set two 1-inch-thick sticks about 6 inches apart on the ground (Figure 3, at right). Place four pencil-thin support sticks across the base. Space the support sticks about half an inch apart.
- Stack an inch-thick layer of wafer-thin shavings on top of the support sticks. Leave some space between each shaving to allow for airflow. Set two half-inch thick “bridge” sticks across each end of the base structure to support the heavier kindling you’ll add next.
- Place fine, split kindling across the support sticks. Splittings should be parallel to one another with plenty of space in between. They should not compress the tinder below.
- Apply your match directly underneath the tinder (shavings). When the first flame appears, hand feed shavings (not kindling) into the developing flame. Don’t add kindling until you have a reliable blaze. The raised firebase will produce a powerful draft that creates a bright, smoke-free flame.
 Everyone that spends time in the outdoors should have some sort of water filter in their kit. Whether it's a Sports Bottle type filter, a Canteen type filter, or at least a Survival Straw. There are far too many people that head out for a day trip, or a 3 day'er, and up on Search and Rescue's docket.
However, in a survival situation, a long term stint in the field, or after prolonged use, those filtration systems will stop working eventually. What then? What you need is the "know how" to build one of your own.
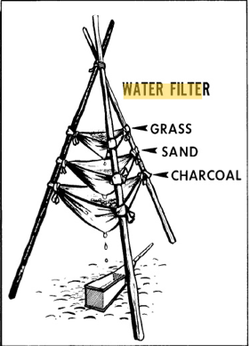
While it may not be the high tech 99.9% guaranteed microbial, and virus filter, it's pretty close if you do it right. Here is a drawing that will help you get the picture.
It is a simple concept, and it works great if you follow these instructions. Use plenty of grass to aerate the water in stage 1.
Try to wash the sand in a creek or stream first to get the loose dirt out, then fill the cloth just enough to not overload it once it is full of water, the sand in Stage 2 will remove all of the small debris that gets through stage one.
In Stage 3, use crushed charcoal made from your fire pit (not ashes, do some homework on how to make charcoal in a can) This stage helps to minimize both microbial and virus involvement.
Stage 4 is boiling the water if you can. Boiling is highly recommended. If you can't, this 3 Stage filter removes many of your problems, and greatly increases your chance of having a water supply you can trust.
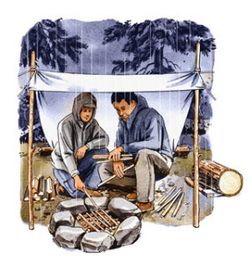
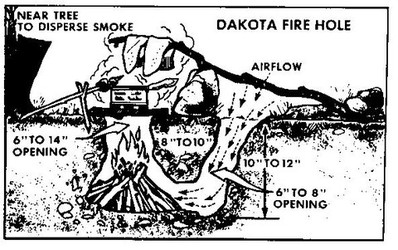 When it comes to surviving, or just being a proficient outdoorsmen, there is something significant about being the fire master. Fires serve many purposes, they are not just for cooking and keeping warm...Keeping your morale high, and maintaining your will to survive are pretty high on the list.
However, when you are trying to lay low (for whatever reason), and keep a tactical posture, fire can present its challenges due to the smoke it creates, giving away your location. Here is a great method of building a "low smoke - to no smoke" fire. It is called a Dakota Firepit, and it works really well in windy conditions too.
Yes, it works GREAT! To keep the smoke to a bare minimum, use small amounts of dry wood, a little at a time, and build up a strong bed of coals to cook on, or whatever. It is also helpful to build this under some strong tree cover to allow the trees to disperse what little smoke there is.
This is an up and coming brand that is going to explode and is starting to do so already. Geigerrig has won just about every award in the world for hydration systems and blows Camelback out of the water.
Here is a video explaining how they work. Please take a few minutes to watch, you owe it to yourself to give these a try.
Once people learn about them they will never go back to a traditional hydration pack. I myself will never go back to a traditional hydration pack.
The Geigerrig just has so many more uses, the ability to use any water source as drinking water, ability to spray, to share, is easier to clean/dishwasher safe, it is simply better in every way.
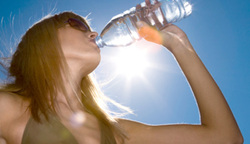 In the summer particularly, dehydration poses a risk to everyone outdoors – especially hikers and campers. Because they’re outside for long periods of time with limited resources, outdoor adventurers must take extra care to avoid dehydration and its unpleasant, potentially serious effects.
The medical definition of dehydration is a condition in which one’s body is lacking the fluids it needs for normal operations. It happens when the body loses more fluid than it’s taking in – a common occurrence in the outdoors – for extended periods of time. When a person gets dehydrated, they lose more than just water. Electrolytes such as potassium and sodium also flow out of the body faster than they’re replenished.
Dehydration has several distinct symptoms, the most obvious being thirst. This doesn’t happen to everyone who’s dehydrated though, so it’s important to watch out for more indirect signs for the condition. If you’re feeling especially weak, dizzy, or are experiencing a dry skin feeling, you might be dehydrated.
What to Do When Dehydration Occurs
If recognized early enough, mild dehydration isn’t all that difficult to take care of. Just give the person fluids, preferably a sports drink or other solution with electrolytes, and have them rest for awhile. If it’s mild to moderate, they’ll recover fully after a short rest and increased fluid intake.
In severe cases of dehydration – which has symptoms including disorientation, low blood pressure, and rapid heart rate – it is usually necessary to call a doctor. Though dehydration seems to be easily curable, it can be very dangerous if left untreated for too long. In the worst cases, a person suffering from the condition can even go into shock. Thus, if severe symptoms are present, get medical assistance and have the dehydrated person rest with fluids while you wait for help to arrive. Even in the worst examples of dehydration, medical professionals can treat it effectively using intravenous fluids.
A few groups are particularly susceptible to dehydration, including the elderly, children, and infants. Since infants and children often don’t voice a dehydrated condition quite so well, make an effort to keep them well hydrated on especially hot days. In addition, watch out for less frequent urination, dry mouth, and weakness. As serious as dehydration can sometimes be, it is almost always preventable. By drinking plenty of fluids and being able to recognize the condition’s signs, you and your family can have some fun in the sun without worrying about dehydration.
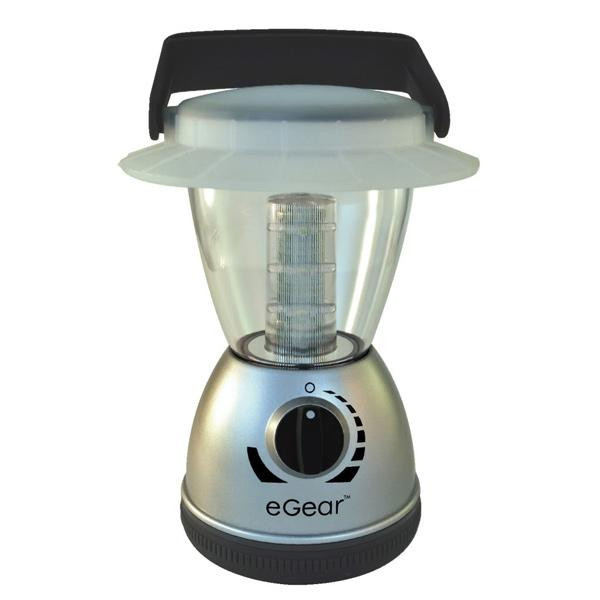
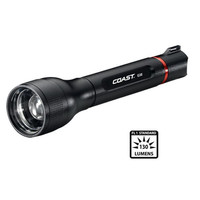
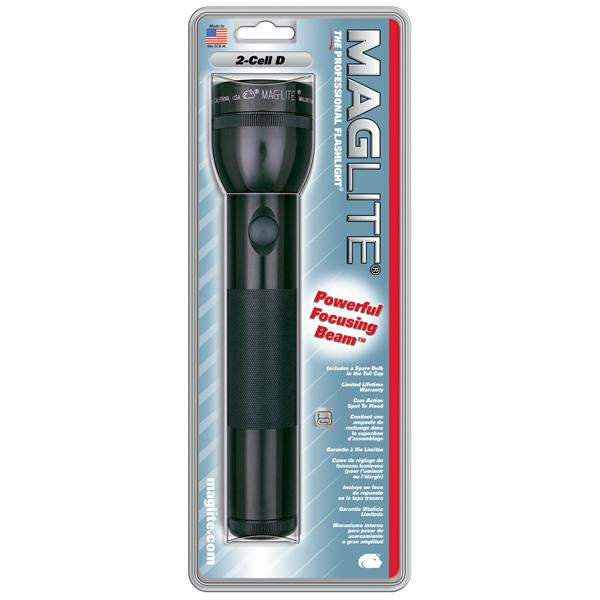
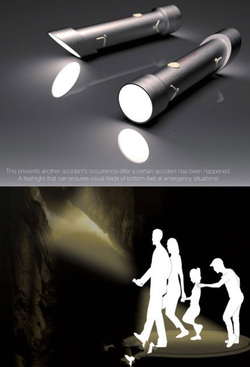 No doubt that once most preppers sit down and build an inventory of survival provides to refill on – a electric lamp is one amongst the primary things thought of. I have created no secret that I actually have a significant electric lamp fetish. I actually have flashlights scattered all of my house and in my cars. there's a electric lamp in every of my youngsters rooms – and that they all have batteries in them and work. The importance of a electric lamp in associate emergency can't be exaggerated. Power out? therefore is your ability to check within the dark. If you're reading this diary – I don't have to be compelled to get into detail why your ought to have many flashlights around. If you're not acquainted with semiconductor diode technology in flashlights – let American state enlighten you. semiconductor diode flashlights have return on means within the past few years. nowadays – they're extraordinarily bright, durable, and therefore the batteries last for much longer than common flashlights of constant brightness. The bulbs last nearly forever that could be a massive and. There ar some terribly nice semiconductor diode flashlights out there at your department of local government store similarly as from several of my sponsors.
LED flashlights ought to be purchased knowing however bright they're. electric lamp brightness is measured in lumen’s. some years agone a semiconductor diode electric lamp was pretty smart to be throwing out 8-10 lumen’s. Today’s high-tech LEDs will simply throw out over a hundred lumen’s – and at pretty affordable costs.
Find Best Choice @MountainManSupply
I am slowly however for sure weakening out “regular” flashlights and exchange them with LEDs. they're simply way superior with the brightness and long battery life. In response to a different recent post I did on flashlights – one reader mentioned concerning the vulnerability of semiconductor diode lights to EMP. I had ne'er thought-about this before. therefore – I did some analysis and here is what I actually have found:
•No one is aware of as expected. till the time comes that there's associate actual EMP attack – opinions on the results of a spread of electrical instrumentality as well as flashlights – ar simply that – opinions.
•Small natural philosophy like AM/Fm radios and semiconductor diode flashlights (both semiconductor diode and regular) aren't established by EMP to a good level to to theirvery short conductors. EMP likes long wires like power lines to capture the EMP.
•LED flashlights are dead once associate EMP attack. There ar people who state that just about any natural philosophy are toast. therefore – let’s hope there's no EMP attack.
Alright – enough concerning flashlights. If you are doing not have a bunch of them with further batteries…….get them. purchase them low cost, purchase them giant, purchase them little – however simply purchase them.
don’t forget the extra batteries.
|

 RSS Feed